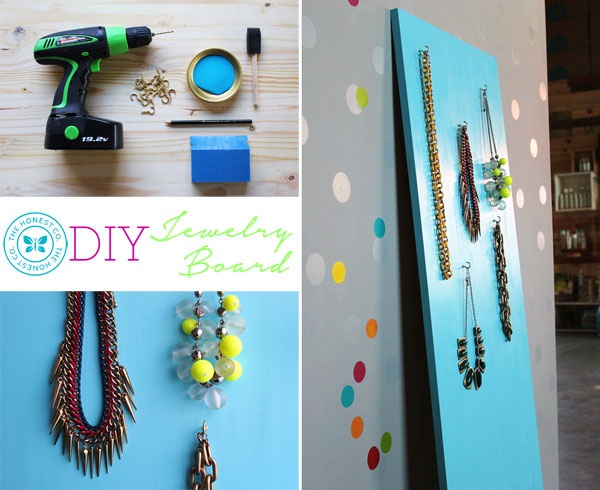
Do you ever find yourself scrambling for the perfect statement necklace to complete your outfit because you can’t remember where you left it last? Or maybe you’ve been late to work because you wasted five precious minutes trying to untangle the pile of chains in the bottom of your purse. Whether you are looking to get organized, or simply add a splash of color to your room in a totally new way, this DIY jewelry board is sure to be the perfect Saturday afternoon activity!
Organizing and decluttering is also a great way to reduce stress by bringing order to your immediate surroundings. If you have little ones in the home, you may also choose to mount the finished piece on a wall or cut your board in half lengthwise for the perfect display to lean atop a dresser. This will provide the same decorative organization, but will keep your things away from little hands and mouths.
Materials
-
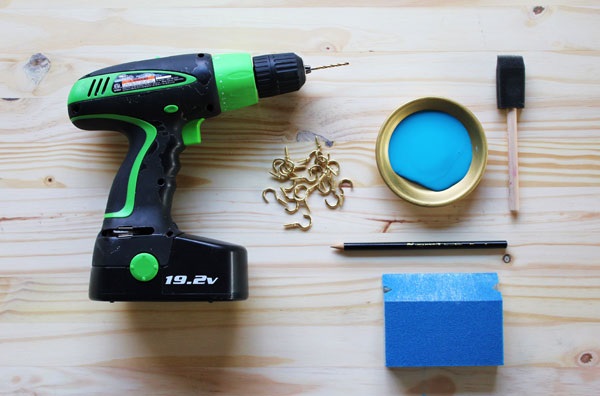
1 panel of pine (21/32” x 18” x 48”) or any similar sized scrap or reclaimed wood
-
¾” cup hooks (12-20 pieces)
-
Non-VOC or non-toxic paint
-
Electric drill
-
Sandpaper or sanding block
-
Pencil
Instructions
-
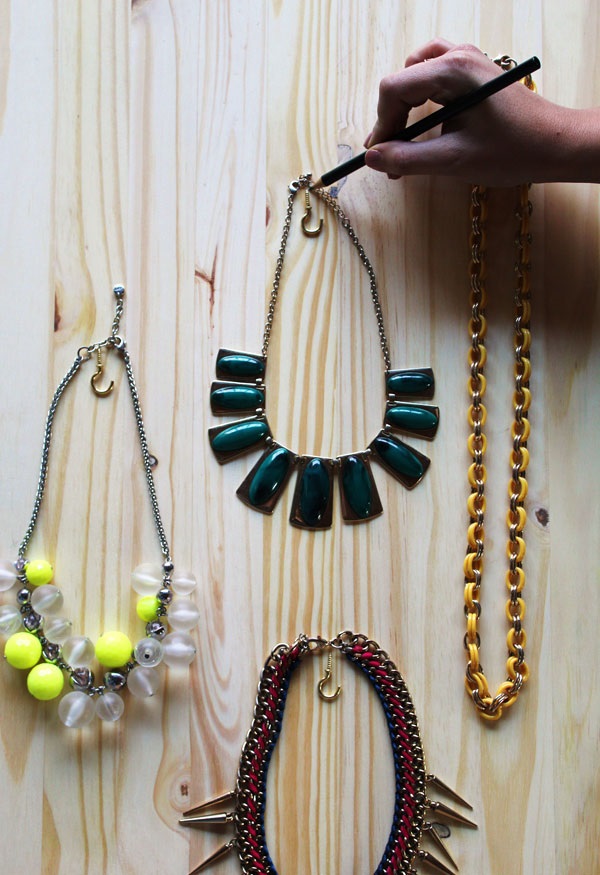
Lay down your piece of wood and arrange a few necklaces of different lengths to get a feel for your spacing. Note that they will hang vertically, so you want to leave enough space that they will not overlap or get tangled. Use your pencil to mark where each hook should go. I chose to make mine randomly spaced with room for long pieces and shorter pieces, but if you prefer orderly and symmetrically placed hooks go for it!
-
Carefully drill about ½” into the wood in each spot where you left a pencil mark. Use a less is more approach when doing this to prevent from drilling all the way through the board.
-
Carefully sand your board to smooth the surface and edges of your board to prep for painting. Wipe away any wood dust.
-
Paint your board! Depending on the look you are going for you may choose to apply a coat of primer first but this is not necessary. Let dry overnight.
-
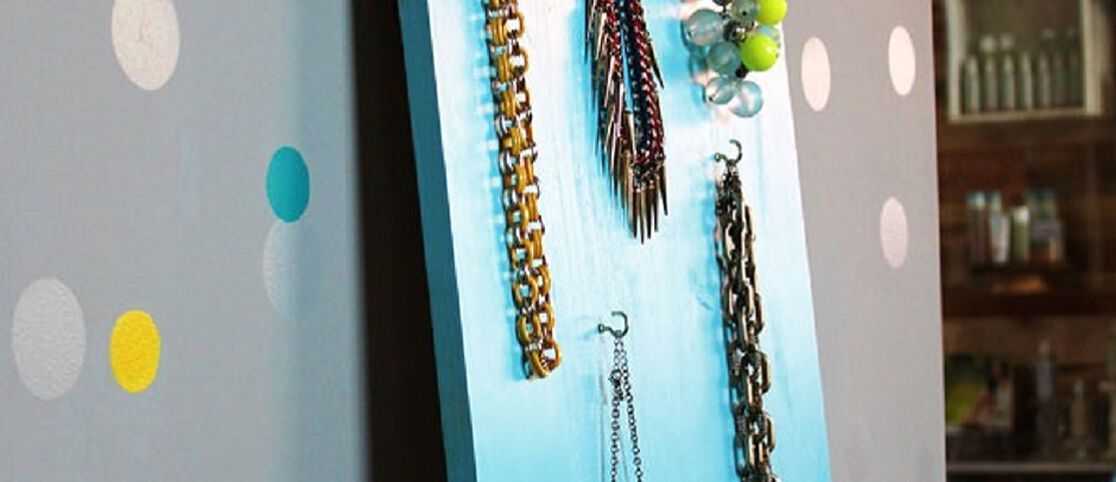
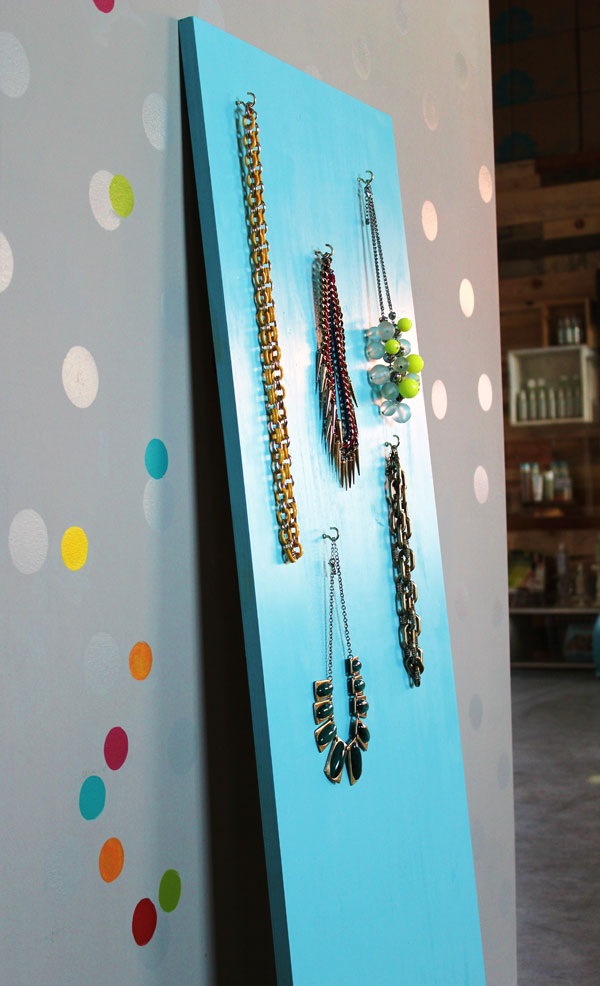
Screw your hooks into your pre-drilled holes and you’re done! Arrange your necklaces on the hooks and lean against your bedroom wall. You’ll never have trouble accessorizing again!
This DIY is a very easy one to adapt to any theme or decor of your choosing. Feel free to pick a coordinating color to match your room, or a contrasting one for a pop of color. You can also use a piece of reclaimed wood and omit the painting step for a more natural look.
Have you made anything to organize your jewelry? Tell us in the comments!
We aim to provide you with the most honest and credible information possible. This article was reviewed for accuracy by The Honest Team and was written based on sources that are linked at the bottom of the article.
blog_review_statement