Spring is just around the corner and with it comes the time to purge. Out with the old, in with the new, cleaned and organized from top to bottom. However, we realize that tackling a big spring cleaning list can feel somewhat daunting, so it’s best if you break it down into smaller chunks. You can use our checklist and cleaning tips as a guide, and plan on tackling just a handful of items each day until the project is complete. You’ll have your home cleaner, healthy, and organized in no time, sans the pain and stress of overwhelm.
Replace Toxic Cleaning Supplies
Before you start, it’s a great idea to assess your current cleaning supplies. Toss out anything that’s toxic and make a list to replace the cleaning products with non-toxic, eco-friendly versions. If you’re struggling to let go of cleaners because you recently bought them and they are still full, try replacing your top three with natural cleaning products. Then you can slowly phase out the others as they run low, and it will feel less painful. Switching out your cleaning products is one way to learn how to be more eco friendly in your home. Once you’ve got your cleaning products in order, you can start tackling our checklist. We recommend going room by room, that way you can feel the satisfaction of having each room fully completed, which will be motivation to keep going and gaining victory over the rest of your home.
Start in the Kitchen
Your kitchen is an excellent place to begin operation spring clean. Evaluate your fridge and pantry. You can start by tossing out all expired food, including:
- Expired canned goods
- Expired crackers
- Stale cereals
- Other dry goods that are past their prime
We can bet you have more than you might realize of stuff like this, and it just clutters up your pantry space. Seriously, when’s the last time someone ate a bowl of cereal from that box that has barely half a cup left? Probably months and months ago, which means it’s stale and gross. Chuck it!
This is also a great time to go through:
- Your Tupperware cabinet
- Your pots and pans
- Your dishes
- Your flatware
- And the multiple appliances and gadgets you rarely (if ever) use
Let’s be real, do you really need two blenders? Probably not. You also probably don’t need 3 sets of dishes. One will suffice, two if you’re worried about having enough for company.
Purge everything by measuring it against the litmus test of asking yourself, “Does this item bring me joy?” If it doesn’t, either box it and plan a garage sale, or even better, donate it somewhere so that someone else in need could enjoy it. Trust us, you’ll feel better when you do!
Once you thoroughly declutter your kitchen, cabinets and drawers, pantry, and fridge, you can get to the business of deep cleaning. Make sure you clean out the appliances you choose to keep, and don’t forget any shelves, windowsills, blinds, and baseboards in the area.
You should also make sure to disinfect:
- Your oven
- Under the stove hood
- And on the tops of any high surfaces, like cabinets and fridge
Leave no surface un-scrubbed, un-dusted, or unorganized! The final step should be mopping your floor, so you can allow it to dry while you take a much-deserved break.
Bathrooms
On day two, you can tackle your bathrooms. If you only have one bathroom, your job is even easier. If you have multiple bathrooms, start by attempting to declutter these spaces too. Make sure to douse your toilets with toilet cleaner so it can sit while you’re going through these next steps, to really get your toilet bowl good and germ-free. You can also spray bath and shower tiles and your shower curtains down with either an all purpose cleaner or antibacterial spray.
Then you’re ready to start trashing things! You probably have loads of junk tossed in your cabinets or beneath your bathroom sink, so go through it all and decide what’s worth keeping and what’s worth tossing. Evaluate your medicine cabinet and toss any expired meds or supplements. You can also get rid of old, decrepit towels, rags, and rugs. This gives the perfect excuse to replace them with new ones!
Toss any old lotions, soaps, and shampoos that you haven’t used in the last six months, because––reality check––if you haven’t used them in six months, you probably never will! It’s just clutter. Go through your bathroom cabinets and drawers and toss out mascaras and primers older than three months. Granted, certain other products you can get away with keeping a little longer, but––do so at your own risk!
Often bathroom drawers are where tons of little items collect, like:
- Bobby pins
- Tweezers
- Scrunchies
- Extra toothbrushes
- Floss
- And other miscellaneous items
Whatever you choose to keep, try to collect them in their own little spots and organize by kind. Drawer organizers are great for this kind of thing!
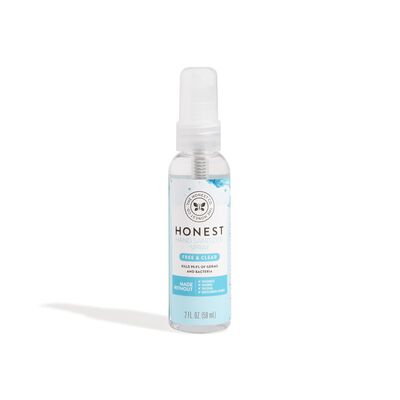
Once you’ve decluttered every bathroom, you can finish organizing what’s left and begin the scrub down. Make sure that if your bathroom has windows, you clean the windowsills and blinds, too. Disinfect everything using our disinfectant spray, including your baseboards. Pay special attention to areas behind your toilets, and as your final step, sweep and mop your floors on your way out.
Bedrooms and Common Areas
Congrats, you’ve got probably the toughest jobs out of the way! Now you can focus on areas like your bedrooms and living rooms. It’s a good idea to start with your closet and drawers and get rid of all your clothes that don’t fit or are rarely worn. Remember to use the litmus test when letting go of old items, by asking yourself, “Does this (shirt, pair of pants, pair of shoes, trinket) bring me joy?”
If the item in question doesn’t make your heart smile, or you feel absolutely zilch, get rid of it. Save your space for only things you truly love. Not only will you be healthier with less clutter, but you’ll also be happier too. Go through your blankets and sheets too. It’s easy to accumulate extra bedding, but rarely do you need all of it. Keep only what’s needed:
- The main set for each bed,
- A spare set for each bed
- And your top two favorite throw blankets for every room
Donate the rest! The same goes for other items around your home, in your bedrooms and common areas. Maybe it’s old decor items you are no longer in love with, maybe it’s old electronics no one ever uses. Again, if you don’t use it frequently and you don’t adore it, it shouldn’t take up valuable space in your home.
Once you’ve decluttered, rearranged, and reorganized, be sure to wash all linen and dust every surface, including the high ones. Don’t forget windowsills, baseboards, and blinds, and move furniture around so you can get beneath and behind it to properly dust. If you have furniture that needs some love, don’t forget to use furniture polish to give your home that extra shine. Your final step should be to sweep, mop, and vacuum the carpet.
Clean and Organize Your Garage
Okay, we realize this one could be mildly ginormous. Every garage is different, and if yours is a hot mess, it could take more than a day for you to whip this one into shape. We vote drafting your family members to help. Honestly, you should probably draft them to help with the entire house, but if nothing else, at least make them help get the garage in order.
If there’s something in the garage you haven’t touched or looked at in over a year, it’s probably safe to get rid of it. That includes old toys for the kids, old toys for YOU, broken tools, and other fun things that seem to collect in every garage, ever. You can also get storage bins and create shelves if you don’t have any, then set about organizing smaller items by kind.
For instance, you can designate:
- One box the toy box
- One box the small toolbox
- One box the “odds and ends” box
- One box the lawn care box
You get the picture! You can also install hooks in the ceiling and hang up items like:
- Bikes
- Mops and brooms
- Scooters
- Weedeater
- Shovels and rakes
Remember that if you designate a home for an item so that every item has a place to go, it makes it much easier to keep up with and remain organized. Provided of course, everyone does their part and replaces items back where they go after use. That’s a challenge all on its own.
Now that your home is clean and you’ve completed your spring cleaning list, you can sit back, relax, and enjoy the time with your family. Learn how to get the spring in your step with these fun at-home spring activities for toddlers.
Trust us, if you follow these spring cleaning tips and attack this project with abandon, you’ll feel so much better when it’s done. Not only will your home be clean, healthy, and neatly organized, you’ll feel pretty spectacular too. Operation spring clean accomplished. Now it’s just a matter of keeping it that way!
We aim to provide you with the most honest and credible information possible. This article was reviewed for accuracy by The Honest Team and was written based on sources that are linked at the bottom of the article.
blog_review_statement


