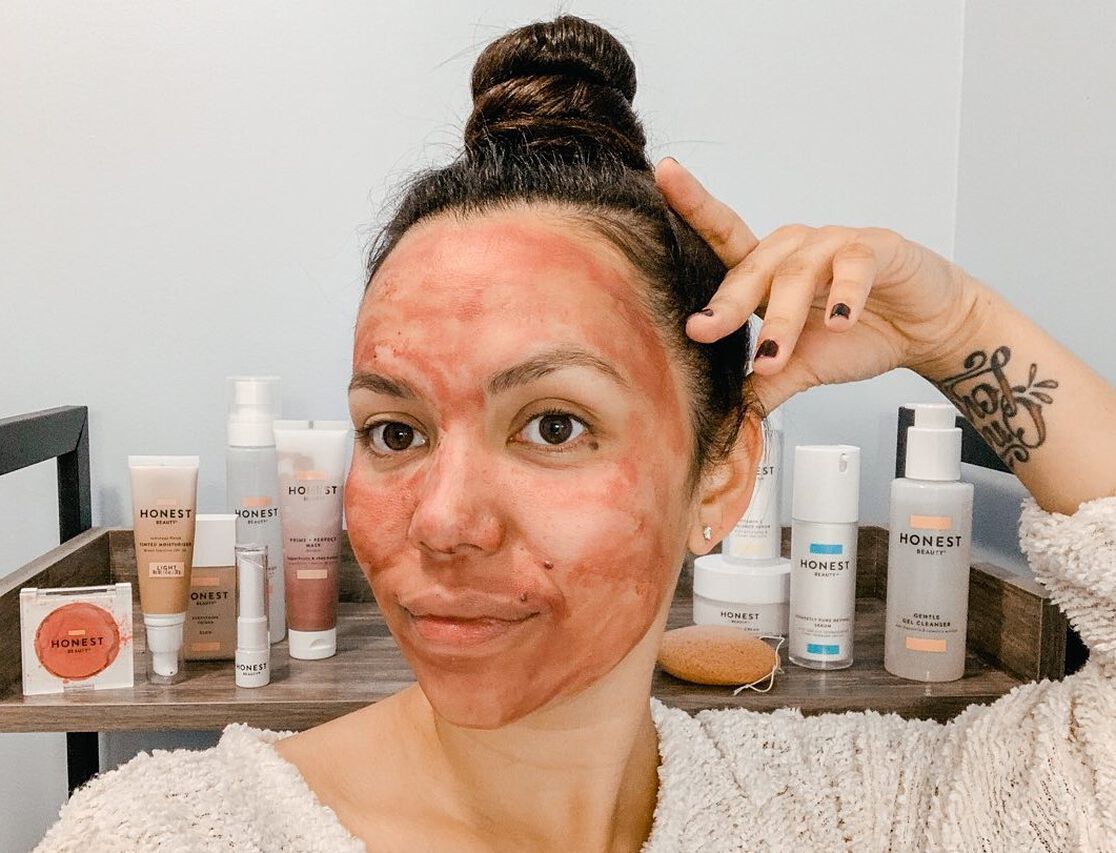
Stuck in the house and can’t go to the spa? Who says you can’t still have a little spa treatment and pamper yourself? Being stuck indoors just makes this the perfect time for a DIY facial at home. The best part is that it’s simple, enjoyable, and effective, using ingredients you probably already have on hand. Image shared by @thesplendidmother
What Can I Use for a Facial at Home?
You should start by thinking like the pros. Pros take a multi-faceted approach to doing a facial. However, if you want to do an at-home facial without spending a bundle on new products, you may be able to use some of your own skincare products that you already have on hand. For a simpler process, you can follow this roadmap:
- Cleanse
- Exfoliate
- Steam
- Mask
- Tone
- Moisturize
If you want to go more in-depth with your facial, follow this roadmap:
- Cleanse
- Exfoliate
- Steam
- Extract
- Mask
- Tone
- Hydrate
The only real difference is the addition of an extraction step. If you don’t need to do any blackhead extractions, skip it. This is your spa day, so you decide!
To give yourself a facial at home, you will need a few tools and ingredients. Consider this your homemade facial kit, reporting for duty. Before starting your home facial, gather:
- Your favorite cleanser, like our Gentle Gel Cleanser.
- Your favorite exfoliating scrub, this can also be homemade.
- Water or tea for steaming, plus a large pot, heat-resistant bowl, and large towel.
- Essential oils (optional).
- Sanitized extraction tools, no finger picking please!
- Your favorite facial mask product or a blend you can make yourself.
- A liquid you can use for toning.
- Your favorite moisturizer.
- Some time, which given the stay-at-home order, you probably have more of than you know what to do with!
If you don’t have an exfoliation scrub you like already, you can make your own. Below are some of our favorite homemade facial scrubs you can whip up in your kitchen.
Honey and Oats
Honey and oats both work to soothe and moisturize the skin. You can mix a half cup of oats with a tablespoon of honey in a small bowl. Add a few drops of your favorite essential oil for an extra boost, such as lemon oil for brightening, and your DIY facial will be ready for action.
Tea Tree Oil and Sugar
Tea tree oil is a natural astringent, so it’s a good one to combine with sugar for exfoliation. Mix 2 to 3 drops of both water and tea tree oil with a teaspoon of sugar in a small bowl and blend well.
Brown Sugar and Coconut Oil
There’s no real scientific method to this one, just take some coconut in a bowl and mix with a tablespoon or so of brown sugar. Blend it until the sugar dissolves completely. Coconut oil has antibacterial properties, so it’s a great ingredient for your face.
As for face masks, there are a variety of different concoctions you can make depending on what ingredients you have on hand. If you’re wondering how often you should use a face mask, it depends on your skin type and mask type! Start with about 1-2 times per week and decide from there depending on how your skin reacts.
Milk and Honey
This is probably one of the easiest face masks to make with ingredients that you have readily available. It's a mild face mask that can be a great addition to any sensitive skin skincare routine, and you can even add in a bit of lemon juice or lemon essential oil to help you get a smooth, bright complexion.
To make this mask, blend 3 tablespoons of honey with milk and a teaspoon of white sugar. Add a few drops of lemon oil if you have it on hand. Apply the mask and allow it to sit for at least 20-30 minutes before rinsing with lukewarm water.
Honey and Avocado
Another nourishing and simple face mask incorporates honey with avocado. This is a great anti-aging face mask. The avocado is rich in good-for-you fats that help to nourish the skin at a deeper level.
To make it, mix the inside of one small avocado with a tablespoon or so of honey and apply to your skin. Allow the mask to sit for at least 30 minutes before you wash it off using lukewarm water.
Oats and Honey
Honey is so useful! Mix some oats and honey for a mask that both nourishes and exfoliates. Just mix about a quarter of a cup of oats with a tablespoon of honey and apply it to your face. Allow it to sit for 15 minutes to help smooth, soothe, and kick acne to the curb. Rinse with lukewarm water.
Yogurt and Strawberries
If you want to whip up a mask that helps with skin brightening and anti-aging, why not try this yogurt and strawberries recipe? All you have to do is mash up a handful of fresh strawberries with 1 tablespoon of unsweetened yogurt, and then apply the mixture to your face.
Make sure you let it sit for at least 20 minutes or so before rinsing with lukewarm water.
Tomato and Cucumber
Last but not least is a tomato and cucumber mask. You'll need to peel your cucumber and mash it so that you get at the pulp. Then squeeze tomato juice on top and blend the two together.
This is a nice cooling mask that is soothing and can even help fade dark spots and blemishes. It also happens to be a great option if you suffer from rashes.
The nice thing about making your face mask from ingredients at home is there aren’t many rules you have to follow. You can use all kinds of natural ingredients and mix and match them to create a face mask that suits your skin care needs.
For instance, if you are looking for brightening and anti-aging ingredients, look no further than the sack of potatoes in the pantry. Potatoes are loaded with all kinds of goodies including vitamin C that help brighten your skin.
Ingredients like lemon juice or lemon essential oils work as a brightening agent as well, and oats can be extremely moisturizing while also working as a gentle exfoliator. You can even use ingredients like baking soda in your face mask mixtures, to help unclog pores.
How Can I Give Myself a Facial at Home?
Cleanse
Cleansing is the perfect way to prep your skin for a facial and remove any surface dust and debris, not to mention bacteria and germs. Make sure you use lukewarm water, as hot water can dry out the skin. Try a gentle skin cleanser or simply use honey and water for a natural wash. Our Magic Gel-to-Milk Cleanser is an excellent daily face wash that helps to clear away impurities while leaving the skin soft and radiant.
Exfoliate
To exfoliate the skin at home, you can use your favorite product or even better, try one of the exfoliation recipes mentioned already. The goal is a gentle process to help increase blood flow and give your face a nice natural glow by scrubbing off dead skin and debris to reveal the fresh new skin that lies just beneath.
Just be careful you don't go overboard with exfoliation, you only need to do a gentle buff. Otherwise you can cause microtrauma and negate the beneficial effects of exfoliation.
Steam
One of the easiest ways to steam your face at home is to bring water or tea to a boil, and add in a few drops of essential oils. You can then pour the water into a large bowl and hold your face over the steam.
Use a towel to cover both your head and the bowl, to trap the steam in. Sit and allow the steam to permeate your skin for at least 10-12 minutes. You can also add fresh herbs to your boiling water for an extra beauty boost or stick with essential oils. Lavender is extremely calming, as is chamomile. Lemon essential oil or Rosemary are also fan favorites for clarifying and brightening the skin.
Mask
This is the best step of all! It’s time to apply a decadent face mask. If you don’t want to DIY that’s fine, you can use your favorite product instead. Whether you have dry skin or combination skin, there are a variety of face masks to suit your needs no matter your skin type. However, it’s always fun to DIY. Just choose one of the face mask blends we’ve already mentioned, or start experimenting in the kitchen and create one of your own! Once you’ve applied your facial mask, allow it to sit for awhile before rinsing it off with clean, lukewarm water. Once you pat your skin dry, you’ll be ready to move on to the next step!
Tone
This step shouldn’t be skipped because it’s the step that helps close your pores back up after you’ve done your facial. You can use a favorite product, or you can make your own toner using simple ingredients like apple cider vinegar and essential oils. Another trick you can try for extra toning and tightening is to splash your face with ice water for a couple of minutes. The extreme cold tightens your skin and helps close your pores even more, much like rinsing your hair with cold water closes the hair shaft.
Hydrate
The final step in your facial regimen should be to hydrate, hydrate, hydrate! Moisture is essential for healthy skin, whether you choose to buy or make a moisturizing face mask. Olive oil and almond oil make for excellent DIY moisturizers and almond oil can even help minimize signs of aging and dark circles under the eyes.
Even though you might not be able to get out and go to a real spa, there’s nothing quite like a DIY facial at home. Next time you're searching for glowing skin, try these home facial techniques!
We aim to provide you with the most honest and credible information possible. This article was reviewed for accuracy by The Honest Team and was written based on sources that are linked at the bottom of the article.
blog_review_statement